
Aaron Cyr, of Manitoba, Canada, is one of those handy guys who makes all sorts of interesting wood projects, which makes sense because he owns Local Oak Wood & Supply. But do you know what else he’s really, really good at making? He knows how to build ice-block igloos that are absolutely stunning and you can, too. He walked us through his process.
Although his process is a little more art than science, he goes at it methodically, so it’s easy for just about anyone to follow along. In all, he said it took him approximately 30 hours to build in temperatures ranging from negative 4 to negative 40. With his permission, Cyr permitted us to share pictures of the project and the key steps, so that just about you can follow along and build one yourself.
How to Build an Igloo
Step 1: Freeze the Blocks
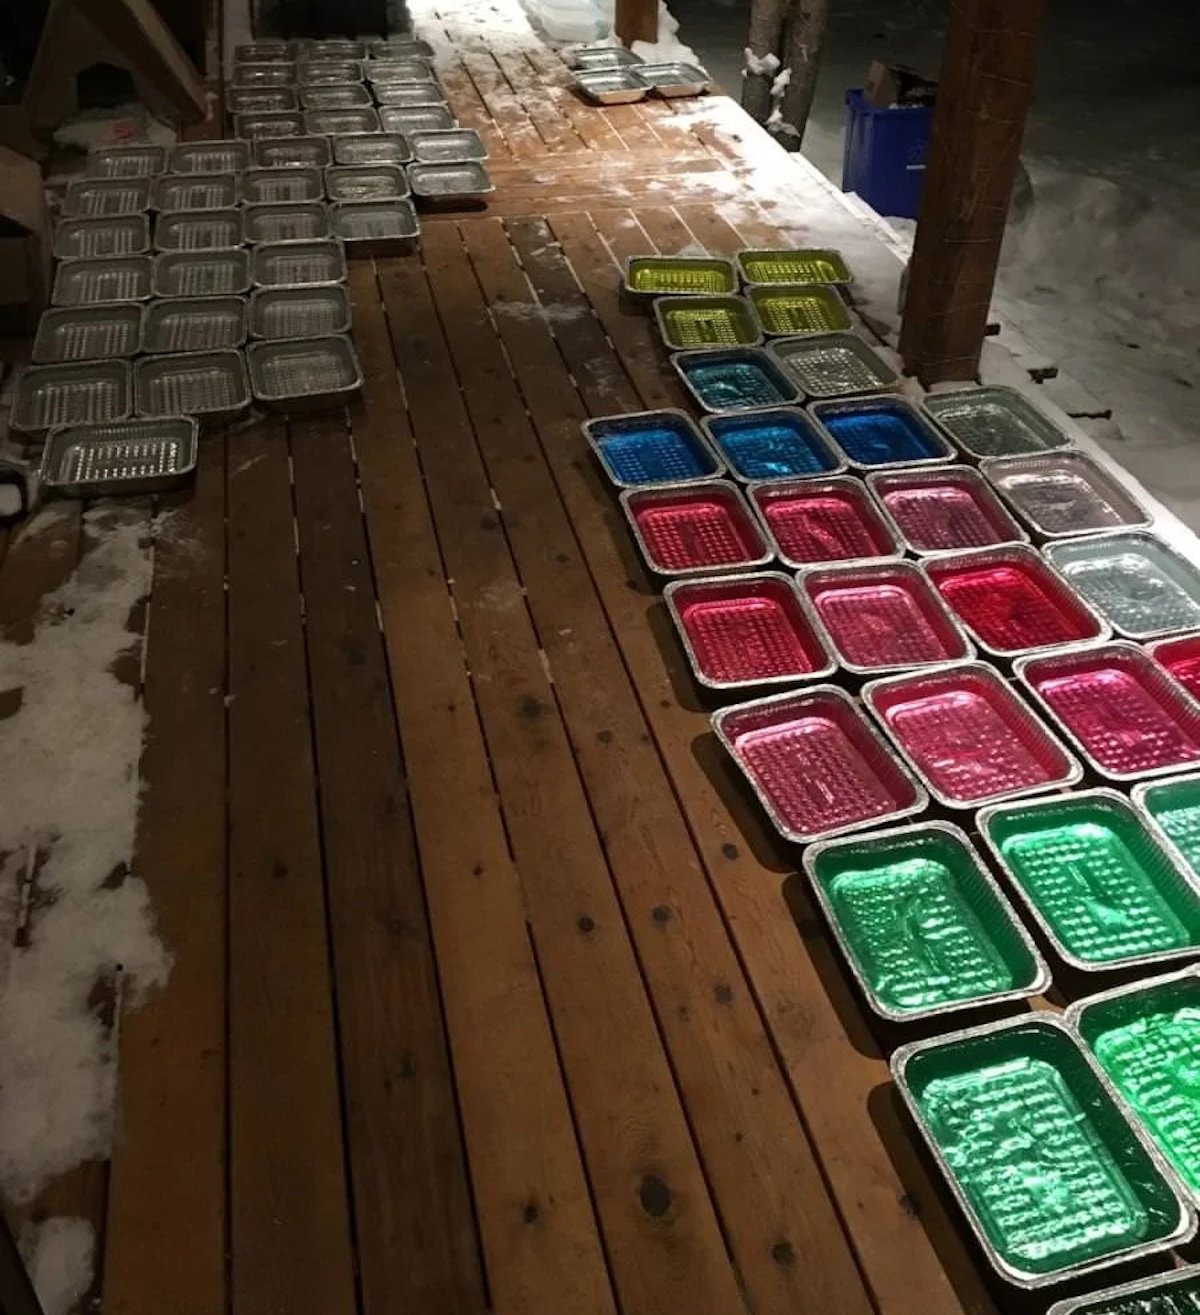
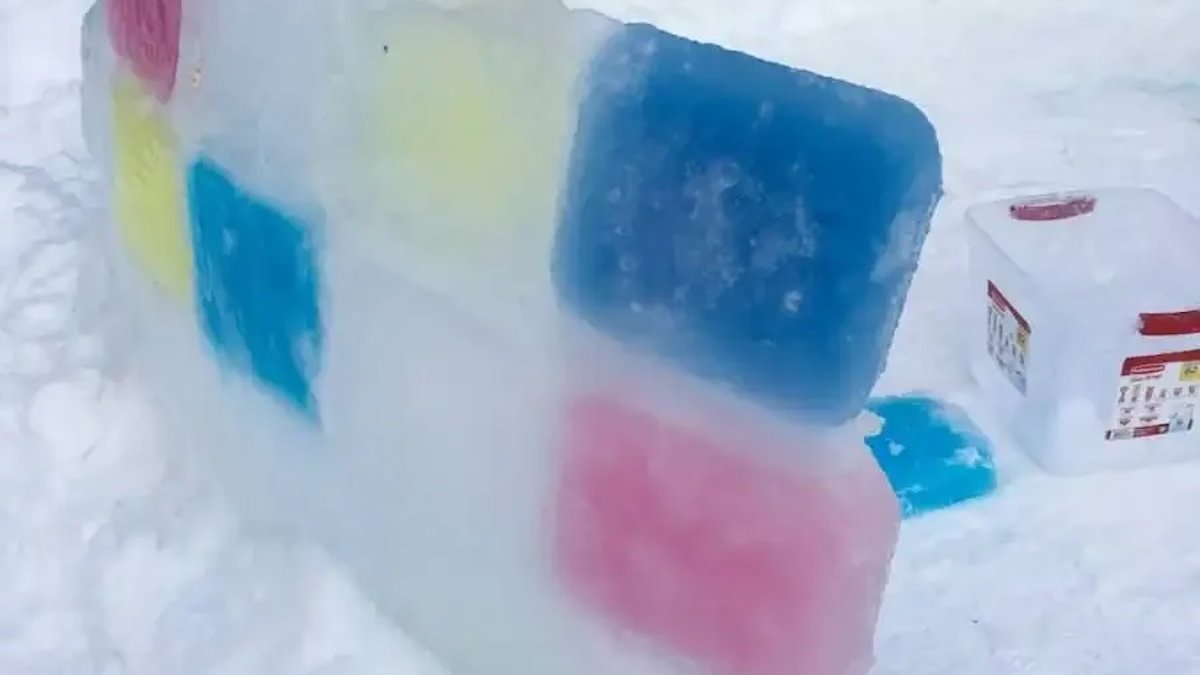
The best way to create the ice blocks is to run a hose from the kitchen sink and freeze them in batches of 50 using foil pans, which he bought in bulk from Costco for roughly $0.50 each. To make it extra fun, add drops of food coloring to the block.
Step 2: Build the Foundation
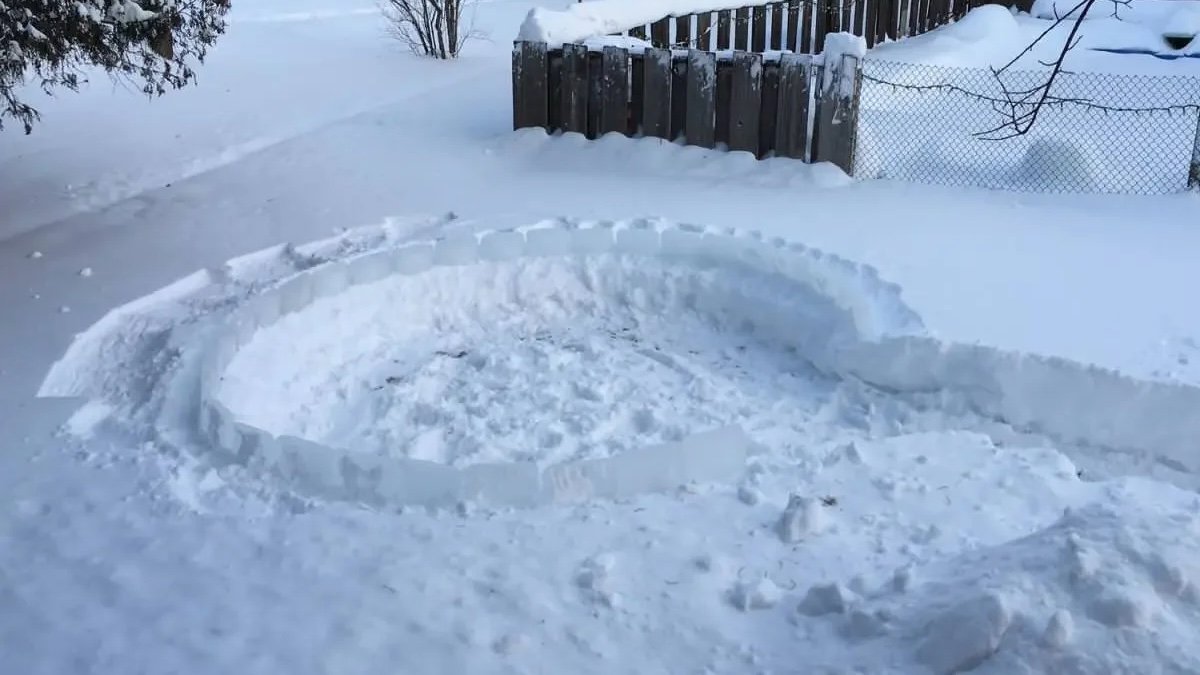
Carve an outline in the snow and then add the bottom layer of blocks to build a foundation. Make sure to place the blocks with a slight inward angle.
Step 3: Add More Layers
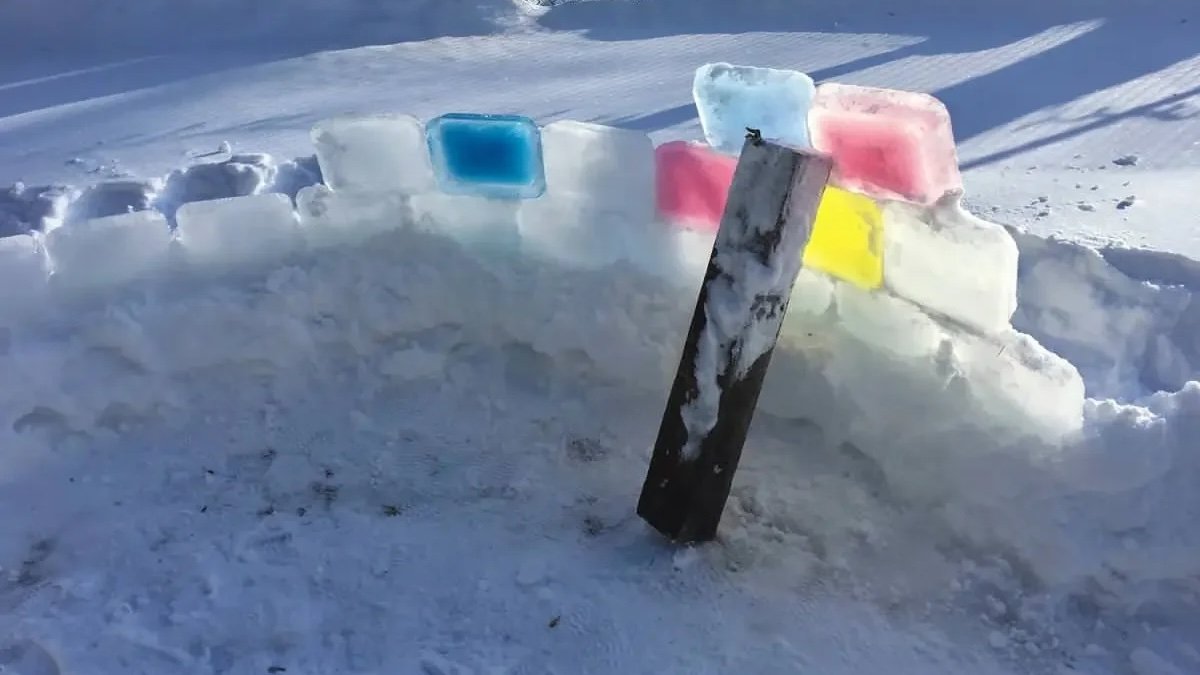
Stack more blocks on top of the foundation. Since the blocks have an angled edge to them from the tin foil pan, alternate their faces on each row. The first blocks are the most challenging to set, but once they freeze, the rest of the row is easier to set.
You can use a piece of wood to support each new row to ensure the ice bricks freeze together and form a solid layer. The bottom blocks usually don’t need support because they’re already frozen.
Step 4: Fill in the Gaps
You should also use a slush mortar to fill in any cracks or gaps between the ice blocks. You can make it yourself in a bin and apply it by hand.
Step 5: Build the Door Before Finishing the Dome
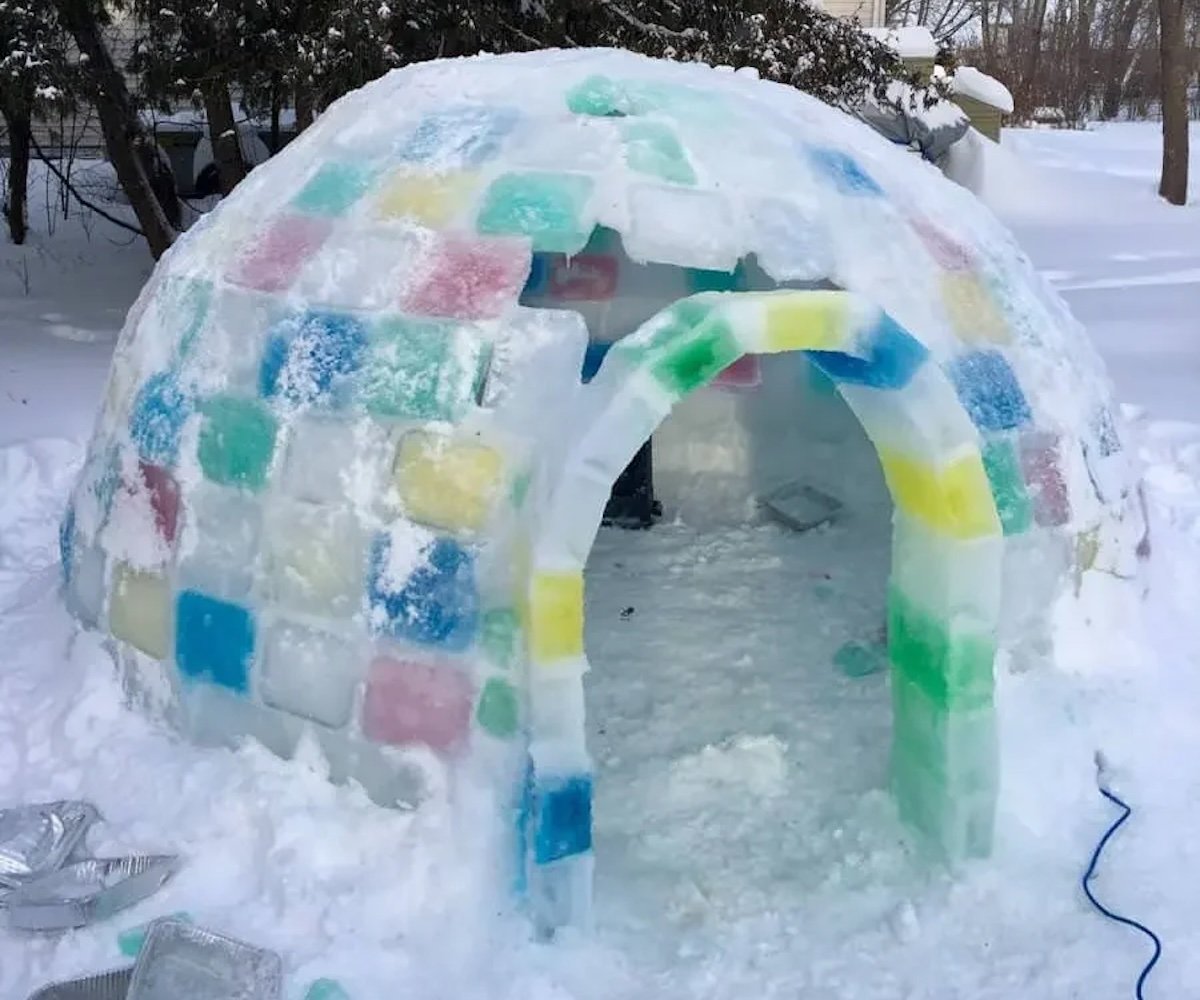
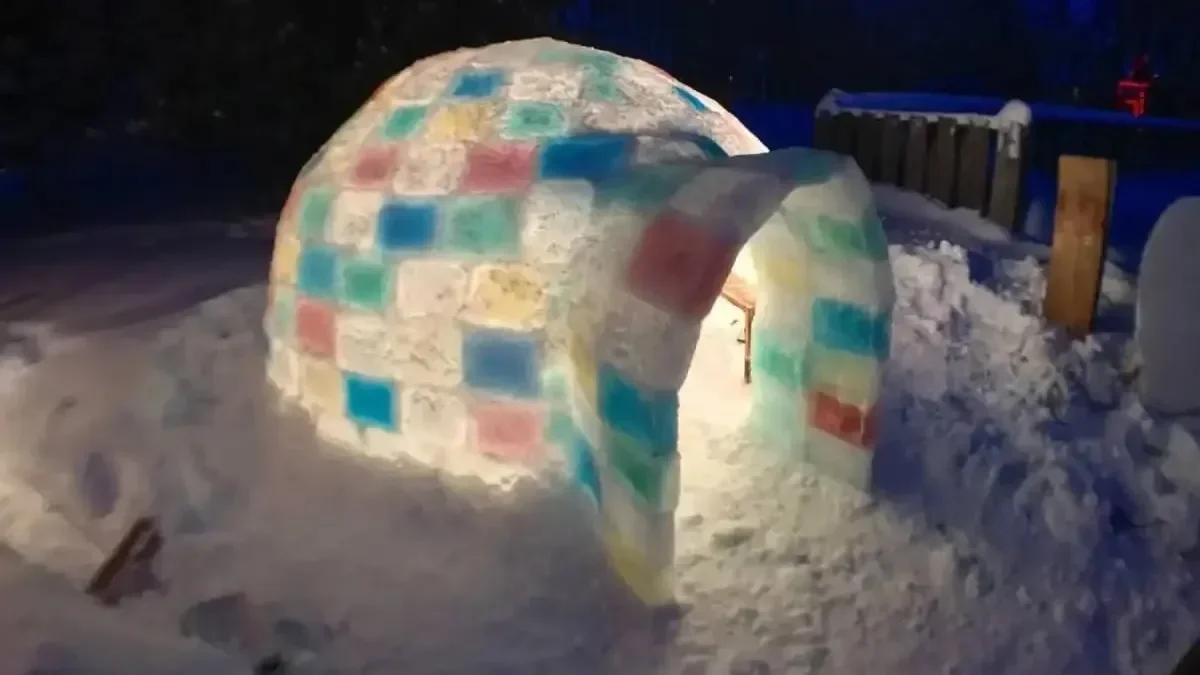
Cyr explained that he left a big gap for the door as he built the main structure because he wanted to leave enough space for people to walk in and out. By the end, the door was approximately 4 feet tall.
Step 6: Decorate Interior (Optional)

With this project, Cyr built an ice-block igloo big enough to seat about eight people. He also installed an LED chandelier hanging from the ceiling, which is all perfect because he said he planned on hosting dinners inside of it.
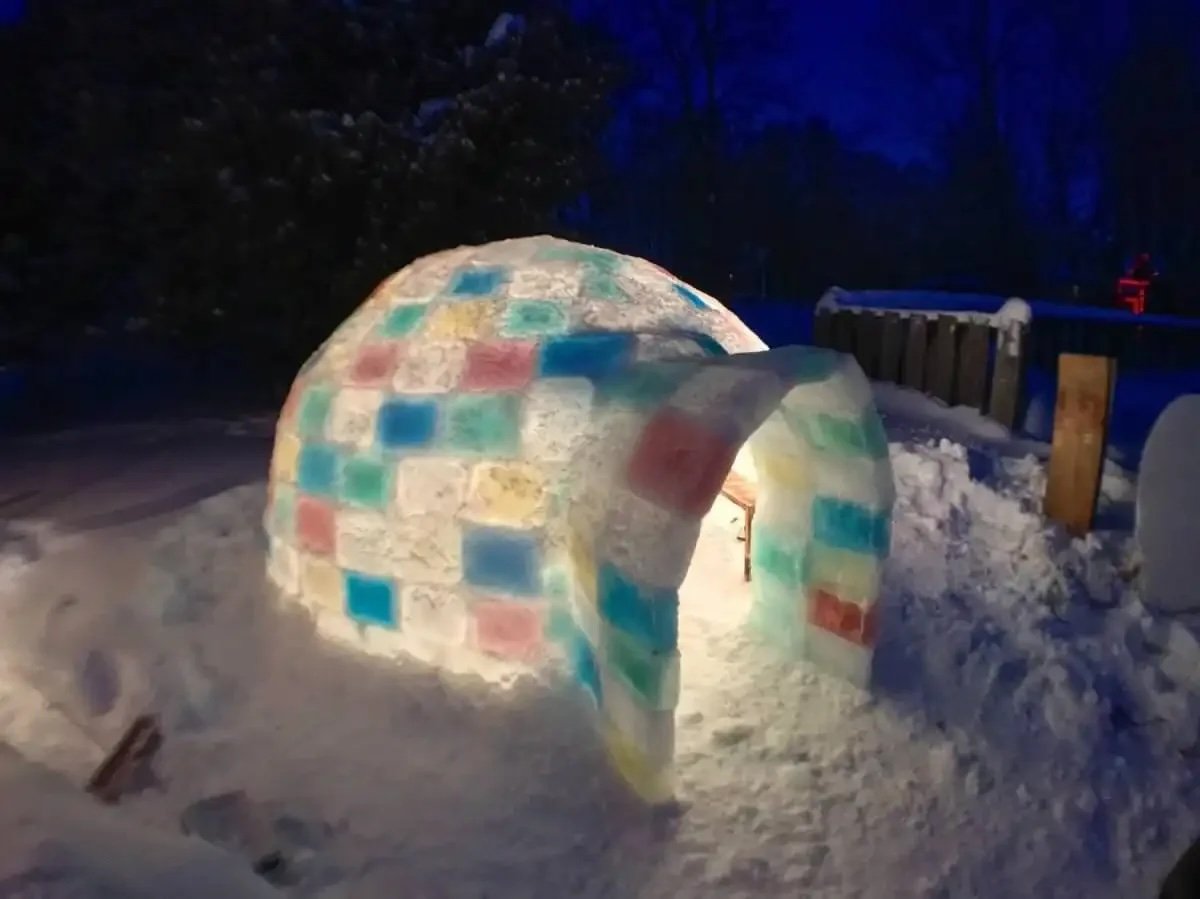
Can you think of a cooler place to be on a Saturday night?
This article was originally published in January 2017.